


Learn: How To Setup Email On The Apple iPad
How do I setup my email on my iPad? It’s a simple and quick process. Below we have provided the 5 steps necessary to setup your iPad email, using Microsoft Exchange as the default option.
Why Microsoft Exchange? We work with many clients who use Microsoft Outlook with our business hosted email service, so this post serves as a useful guide for them. For other email accounts, such as Gmail or Yahoo, iPad email setup instructions are highly similar.
Setup My Email On My iPad: iPad Email Setup In 5 Steps
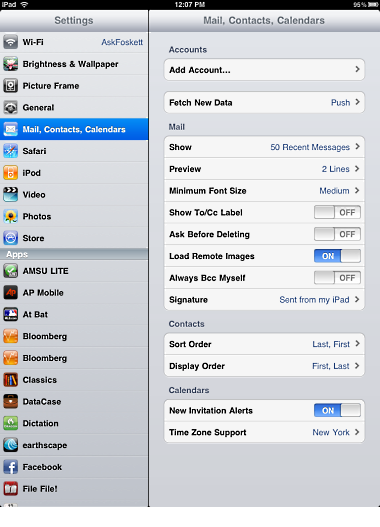
Step 1: Tap the Settings icon from the home screen, then Mail, Contacts, Calendars. Mail, Contacts, Calendars will be highlighted in blue as shown below. Then tap Add Account.

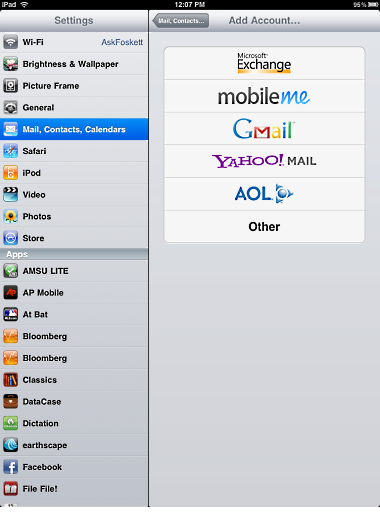
Step 2: Tap the Microsoft Exchange icon, or your email account type.
Note: The below options will also be displayed if you tap the blue and white Mail icon from the home screen of your iPad, without having an email account configured.
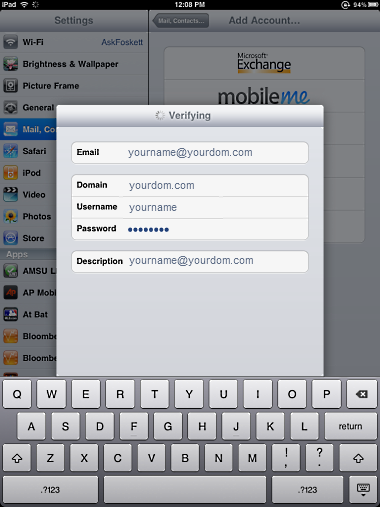
Step 3: Enter your account information.
- Your Email address.
- Domain
- Username
- Password
- Description – this text identifies your iPad email account. It can be anything you want it to be. Example; “Fastmetrics Email Account”.
Note: Replace “yourname” with your actual user name, and replace “yourdom.com” with your actual domain name.
If you’re unsure about any of the above information, your company System Administrator should be able to help you. For Fastmetrics email customers unsure about this email account info, please contact Tech Support.
Step 4: Touch Next. Your iPad will begin verifying your email configuration.
Note: If your Exchange server configuration does not support Auto Discovery, verification will fail, saying it could not validate your account. In this case, you will have to manually enter the server name.
(For Fastmetrics email customers, the server name must be mail.fastmetrics.com, as your Mail, Contacts and Calendar information are stored on the Fastmetrics collaboration server).
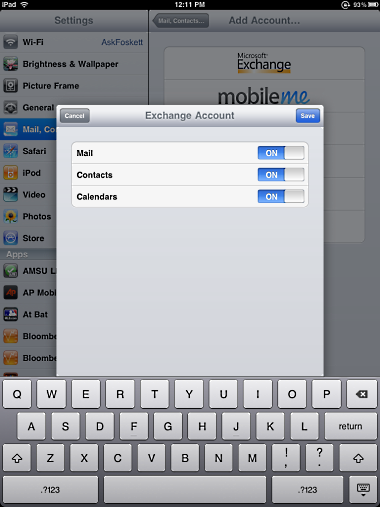
Sync iPad Email, Calendars and Contacts
By default, the iPad will synchronize all three data types, Mail, Contacts, and Calendars, with the Exchange Active Sync server. You can turn one or more of these options off, if you wish. To do this, swipe the option you do not wish to sync, to OFF.
Step 5: Tap Save.
Your iPad will now finalize the email iPad configuration and return you to the Mail, Contacts, Calendars menu while your iPad communicates with the server. Note that it can take a few minutes for calendar entries and contacts to show up.
You’re all done, your iPad is now setup for email, contacts and calendar info.