Learn How To Setup Email On Your iPhone
This Fastmetrics guide helps you how to setup email on your iPhone, fast. We focus on Microsoft Exchange sync for iPhone, as this is the email client most of our customers are using. For other email clients, these steps are highly similar. Follow these 7 simple steps to setup email on your iPhone. Screen shots included so you can’t go wrong!
Email For iPhone Step By Step Guide
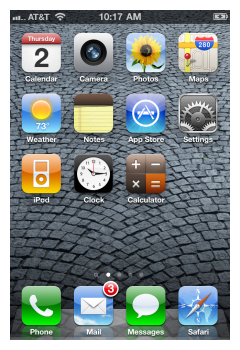
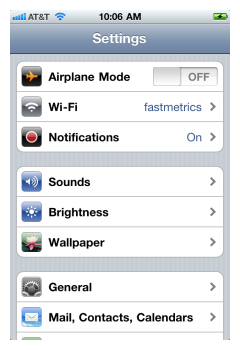
Step 1: From the home screen on your Apple iPhone, touch Settings.
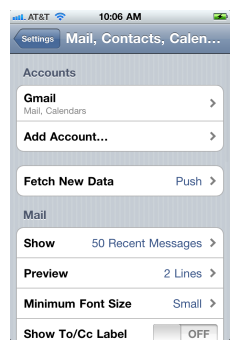
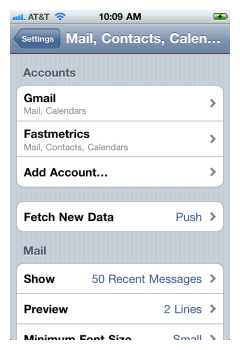
Step 2: Then tap Mail, Contacts, Calendars.
Step 3: Touch Add Account.
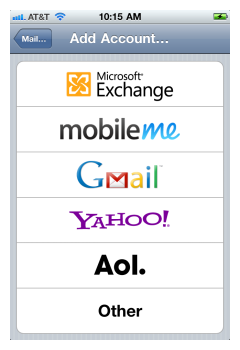
Step 4: Touch Microsoft Exchange (or whichever email client you use), from the list that appears.
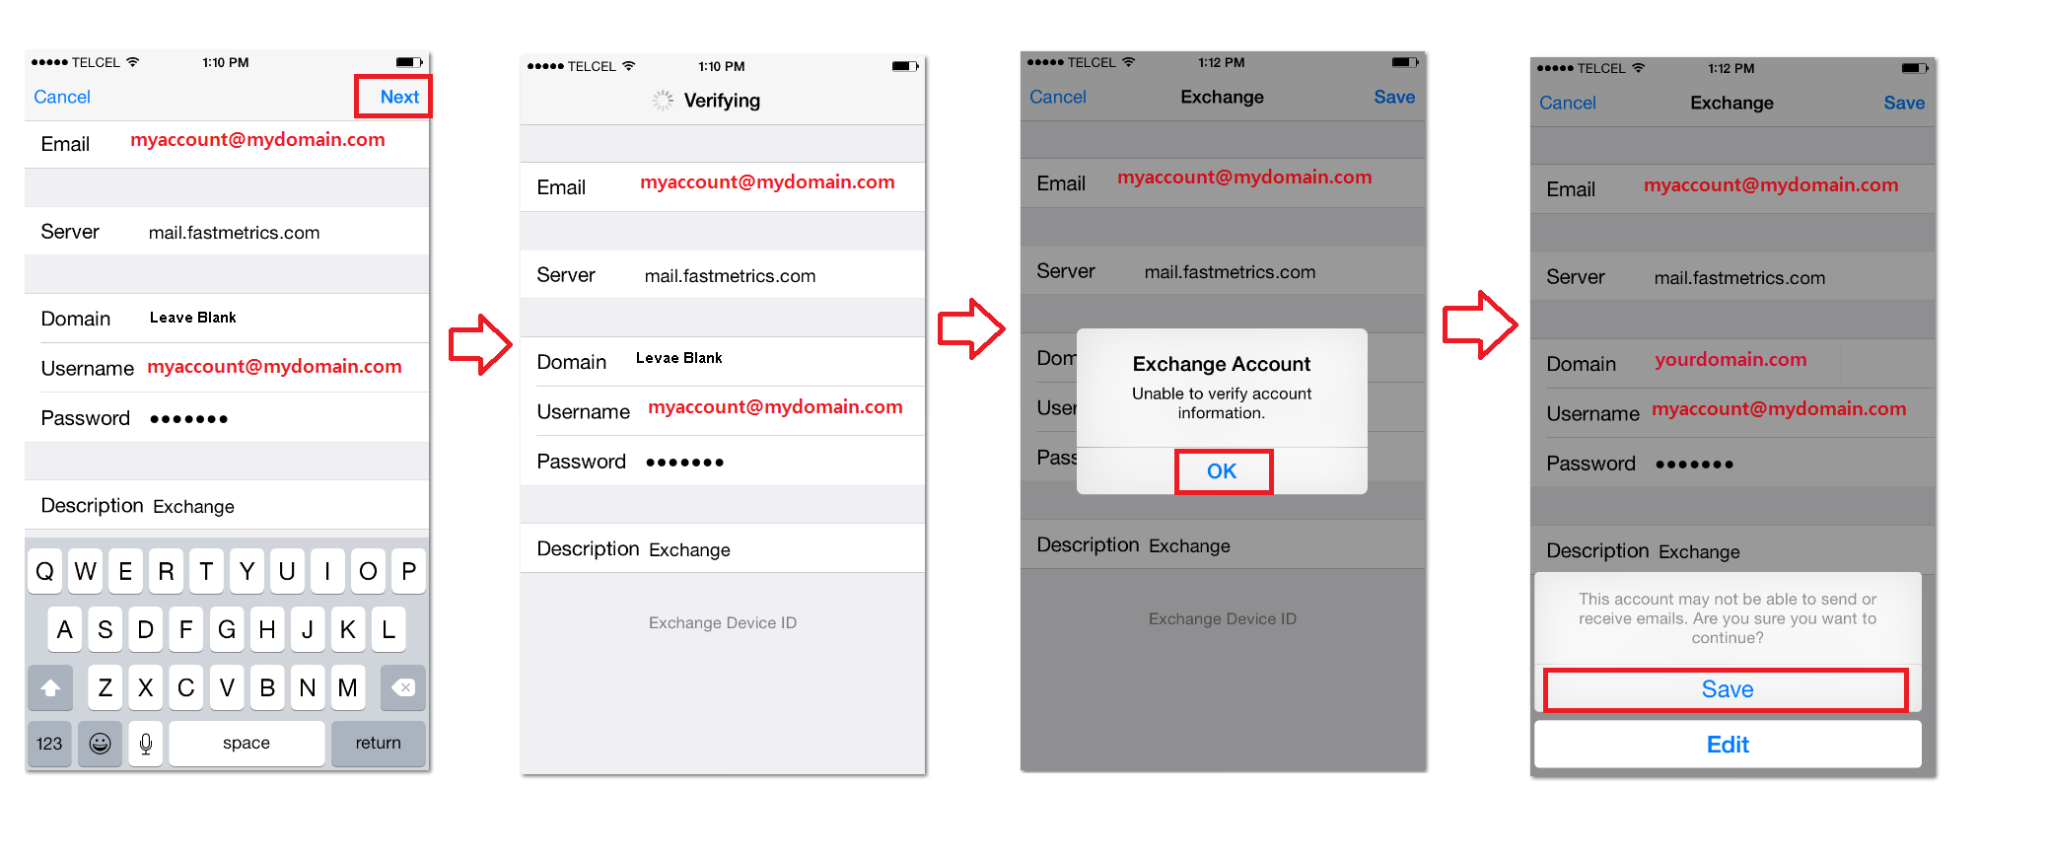
Step 5: Enter your email account information.
- Email: yourname@yourdom.com
- Password: your password
- Description: your description
Replace “yourname” with your actual email user name, and replace “yourdom.com” with your actual domain name. The description here can be anything you want it to be. This is the text that identifies your Fastmetrics (or other email client) to synchronize the account on your iPhone. Unsure about this information? Your system administrator can help you out. Then touch Next.
A screen may appear saying Cannot verify server identity… would you like to continue anyway?. Press Continue. In the new field Server enter mail.fastmetrics.com (or get your email host info). Then touch Next.

Step 6: Verify the account.
- Servername: mail.fastmetrics.com
- Domain: Leave blank
- Username: Your full email address
You might see an error message stating that the Exchange account was unable to be verified, click OK. You will then see a message that says This account may not be able to send or receive emails. Are you sure you want to continue? Select Save.
Step 7: Select the data you want to synchronize. We recommend you to turn synchronization ON for Mail, Contacts and Calendars. Then click on Save. Note that when you choose to sync Calendars and Contacts, local Calendars and Contacts will be overwritten, you can also end up with duplicate contacts. You will receive a warning.
Note: Wait about 10 minutes and email will begin to populate. If after 10 minutes your emails have not yet populated in your newly configured account, please power cycle the device. We hope this guide has helped you answer the question; ‘how to setup email on iPhone’.
How To Remove an Email Account From iPhone
When learning how to set up e-mail on iPhone, in some cases, you might need to remove your email account from your device and add a new account in its place. If you find yourself in such a situation, follow the steps below to remove an email account from your iPhone mobile device:
- From your Home screen, go to the Settings app and press Mail.
- Tap Accounts.
- Under the ACCOUNTS section, locate the email account you want to remove and tap on it.
- Scroll to the bottom and tap on the Delete Account option.
- To confirm, tap Delete from My iPhone.
How To Manage Email Accounts
Even after you have added your incoming server email accounts (another step when learning how to set up email on iPhone), there are still a few tweaks you can make using the Mail app on your iOS device to manage your email accounts seamlessly:
- Set a default account that will be used when composing new messages:
- Go to Settings > Mail and scroll to the bottom.
- Tap Default Account.
- Tap the account you want to use as the default when composing and replying to new messages.
- Switch between email accounts when composing new emails:
- Open the Mail app.
- Press the Compose icon that looks like a paper and pencil.
- Tap the From field.
- Select the account you want to use by tapping it.
- Disable an email account if you have multiple email accounts and are no longer using one or more of them:
- Go to Settings > Mail.
- Tap on Accounts.
- Select the account you no longer want to use.
- Tap the switch next to Mail to toggle it off.
- To re-enable the account, toggle the Mail option back on.
- Repeat this process for any additional email accounts you want to disable.
- Delete an email account instead of disabling it:
- Go to Settings > Mail > Accounts.
- Tap the account you no longer want.
- Tap Delete Account.
- Tap Delete From My iPhone.
How To Set Up Email on iPhone: Add Email to iPhone
If you have more than one email account, you can learn how to add another email account to an iPhone. Add your other email accounts to your iPhone to manage all your emails from your Mail app.
- Go to Settings > Mail > Accounts.
- Tap Add Account.
- Select your provider from the list of offered providers. If you don’t see your provider, select Other.
- If you’re adding a Google account, Yahoo, Outlook, or AOL accounts, you’ll be taken to the sign-in page in your browser. You’ll then need to sign in and grant permissions to the Mail app to manage your email.
- If you’re using another provider, you’ll need to enter your username and password as well as the server settings. If you’re not sure what they are, ask your provider about these details.
- If you’re adding an iCloud account, you’ll need to enter your email address and password.
How To Set Up Email on iPhone: Outgoing Mail Server
If you’re using an email provider like Gmail, Yahoo, or the Outlook app, your iPhone will automatically pick up the correct settings for your outgoing mail server. However, if you’re using a custom email provider, you’ll need to set up or update the outgoing mail server settings on your iPhone.
To do this, follow the steps below:
- Go to Settings > Mail > Accounts.
- Tap the account you want to modify.
- Tap Account again.
- Under the Outgoing Mail Server section, tap on SMTP.
- You will see a list of outgoing servers that have been configured on your iPhone.
- Press Primary Server.
- You’ll then be able to enter or update the information for that server. If you’re not sure what information to enter, contact your IT department or administrator for help.
About Fastmetrics, Inc. Building & Business ISP
Since 2002, Fastmetrics is the Bay Area's only dedicated business ISP. We provide telecommunication services in California and the San Francisco Bay Area. Reliable service - backed by better live and local support. From install to 24-7 proactive monitoring, get treated like a VIP customer. Not a number by a faceless call center. We specialize in managed business internet and phones, dedicated high speed business fiber internet, business WiFi, SIP voice solutions / UCaaS and managed network services. We are a Microsoft and Cisco Meraki Partner. Our team are Certified Cisco Specialists, Ubiquiti Enterprise Wireless Accredited and Polycom Authorized Solution Advisors. We take care of your business network, so you can focus on growth.